If Android developers don’t setup the JDK correctly, you’ll be greeted with nasty errors like this:
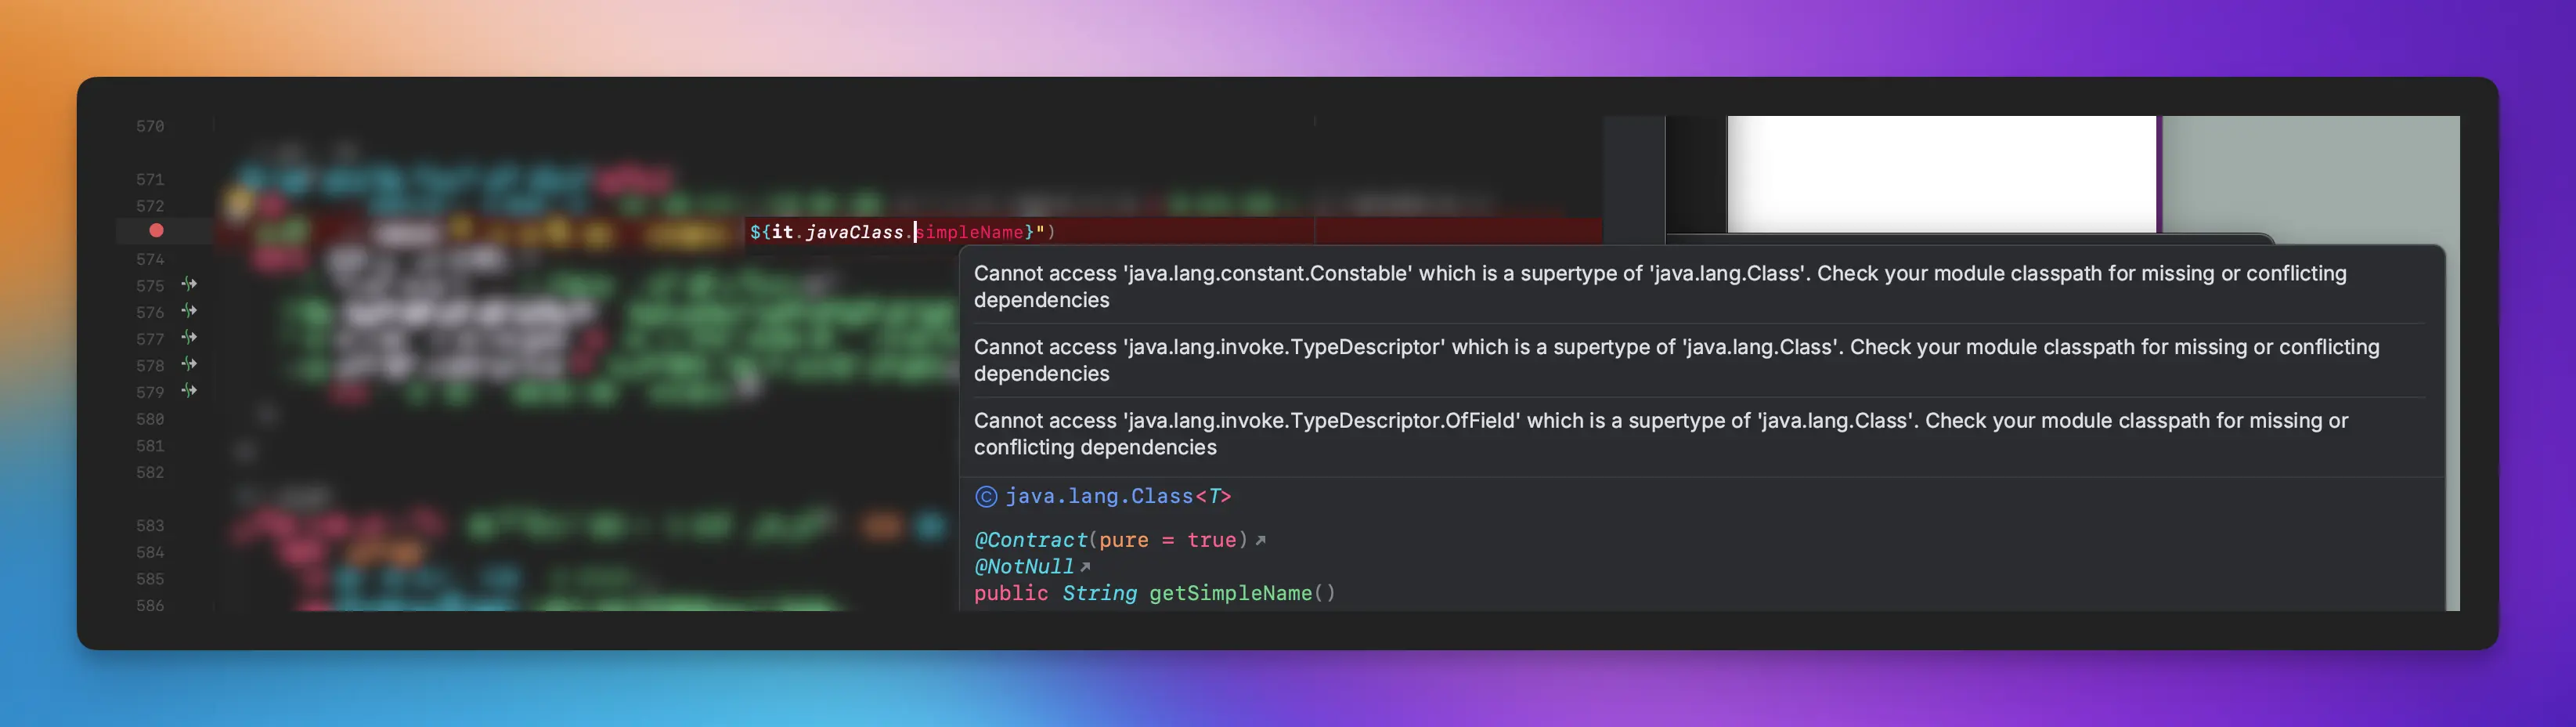
Cannot access 'java.lang.constant.Constable'
which is a supertype of 'java.lang.Class'.
Check your module classpath for missing or conflicting dependencies
Your app might compile fine but the IDE will keep surfacing pesky errors. This is because Android developers have a variety of ways to setup the JDK for your development environment. Too many.
On episode #249 of Fragmented we discussed the numerous JDK options and what they’re used for. Google now has an excellent developer doc for this.1
If you don’t have time to catch up on all the valuable content above, here’s the takeaways:
1. Use the JDK that comes with Android Studio #
JBR2 is battle tested with Android Studio and includes enhancements for running Android Studio well. To use it as your SDK, switch your Gradle JDK to JBR:
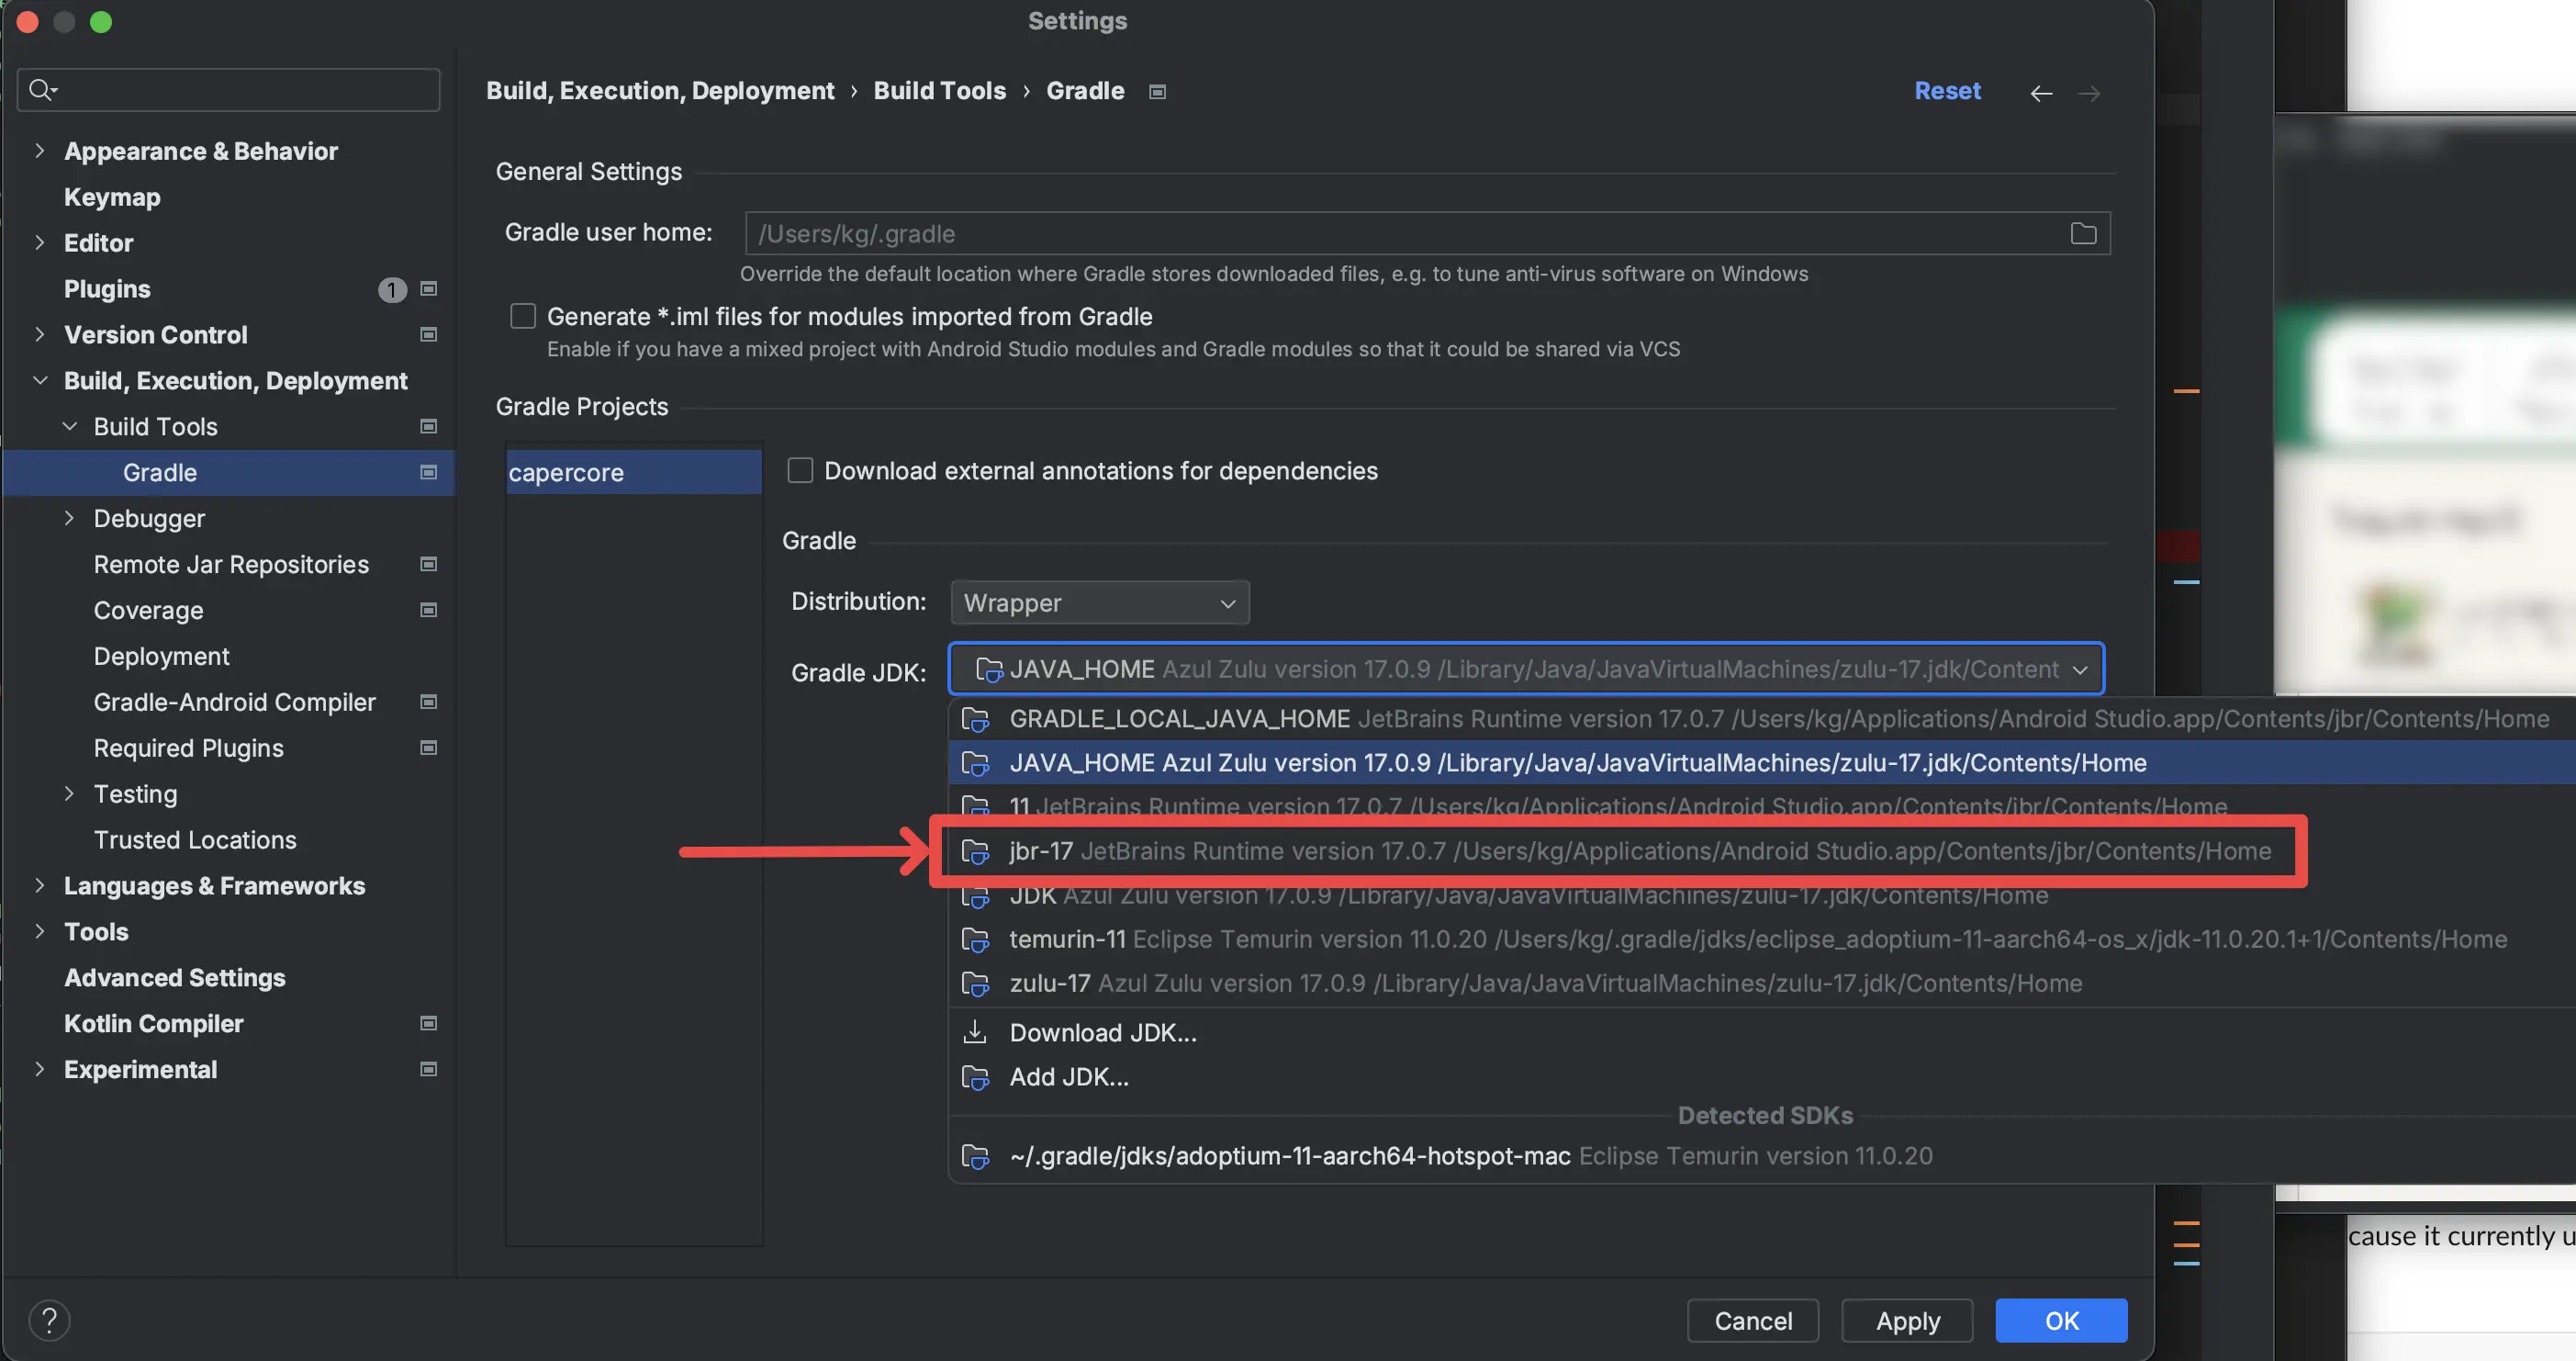
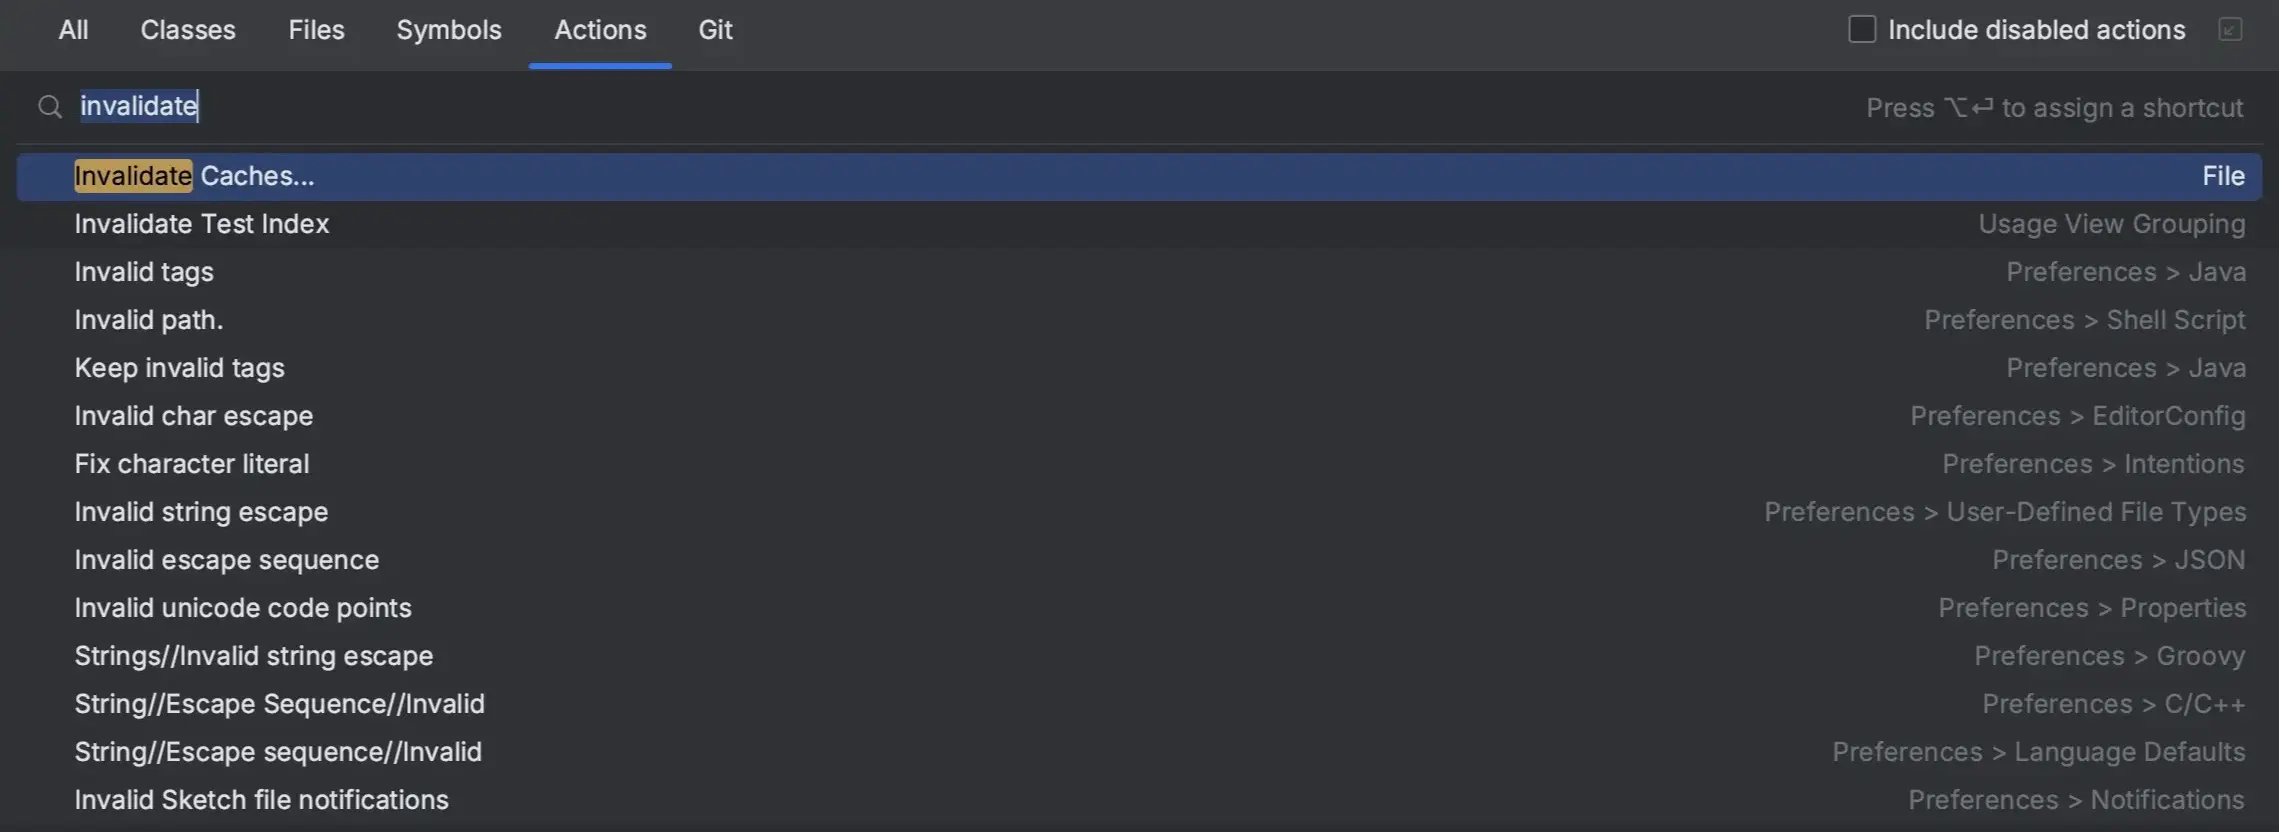
Do a File > Invalidate Caches after this…
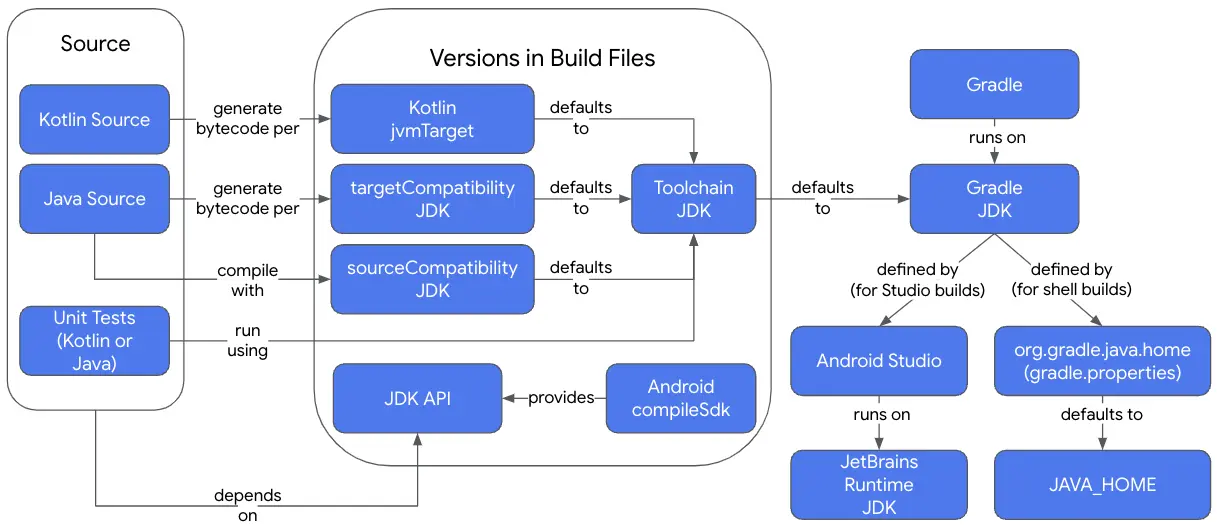
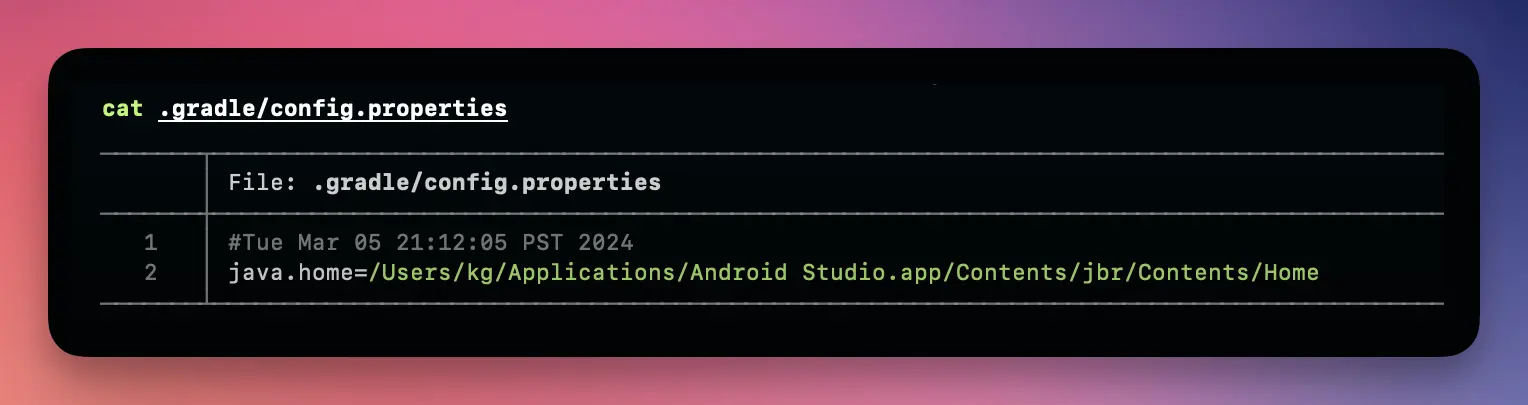
2. Match yourJAVA_HOME with the Gradle JDK
#
The Gradle JDK from Step 1 is used to compile your app from Android Studio. If you use the command line to build your app on the other hand, the JDK from your $JAVA_HOME3 is used.
If both of these don’t match, you can have multiple gradle daemons running around. Make sure to match the two.
# ~/.zshenv
export JAVA_HOME=$HOME/Applications/Android\ Studio.app/Contents/jbr/Contents/Home
If you’re not sure where the jbr-jdk is located:
This is the way.