I use a 13" MacBook Pro at work these days. Android Studio frequently sent my machine into a tailspin.
Over time, I’ve had to tweak and update my AS settings to make AS work well on the 13". I figured I should post them here for posterity and the benefit of other AndroidDevs battling with deathly slow AS experiences.
I’m posting the abridged instructions and linking to the blog posts that led me to these settings, if you care for the details.
Switch to a local gradle distribution #
curl -s "https://get.sdkman.io" | bash # install sdkman

# install your preferred version of gradle

sdk install gradle 5.4.1
sdk default gradle 5.4.1

gradle --status
Once you have a local distribution of gradle installed, switch the “Gradle home:” setting in your Android Studio project to point to your local gradle distribution. You’ll have to do these for all your projects individually.
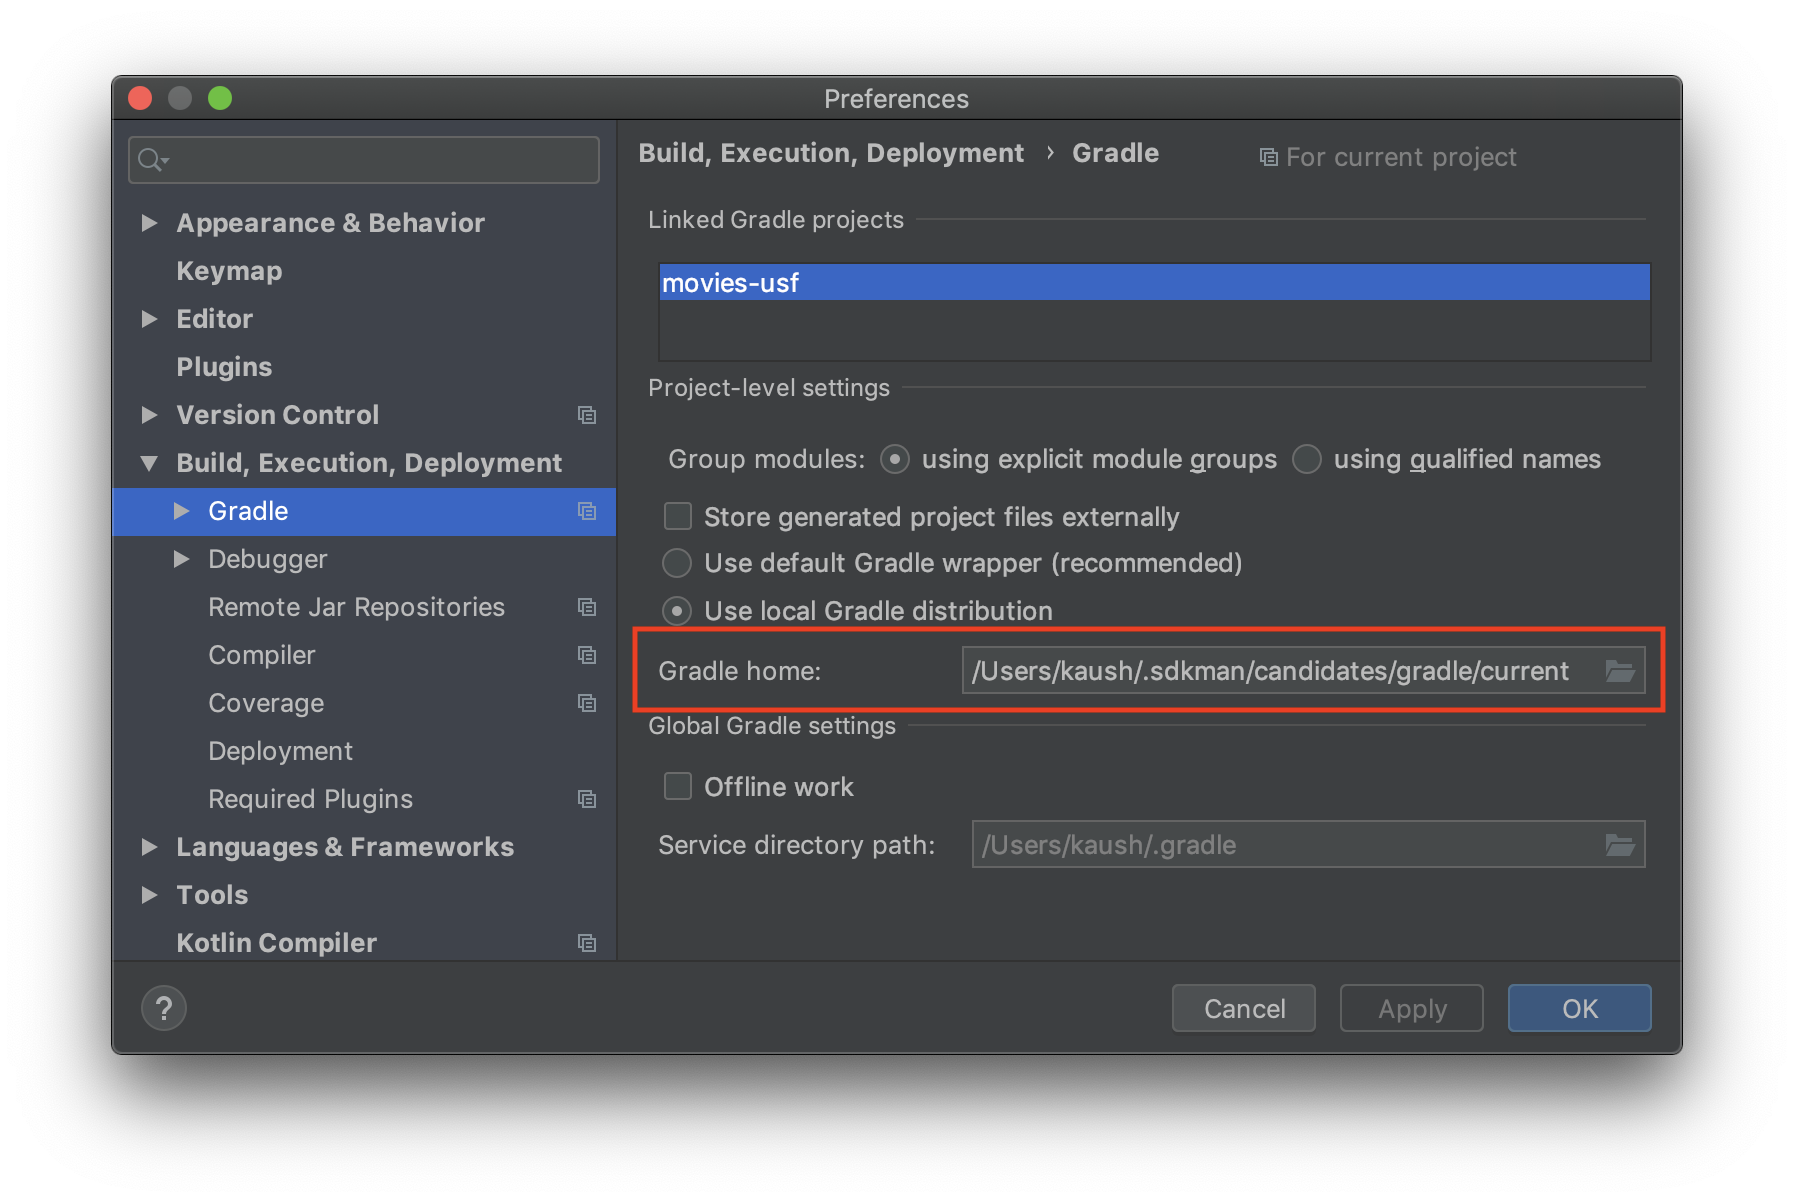
With this setup, when you run gradle on the command line or Android Studio, they’ll share the same gradle daemon instances.
☝️ also make sure the daemons from AS and your command line are compatible ##
Well almost. You also have to make sure you’re using the same JDK otherwise the gradle daemons will be incompatible.
# you have sdkman installed already
sdk install java 8.0.202-zulu  # use java 8 preferably
sdk default java 8.0.202-zulu

sdk install kotlin # cause why not
Now point Android Studio to use this jdk like so:
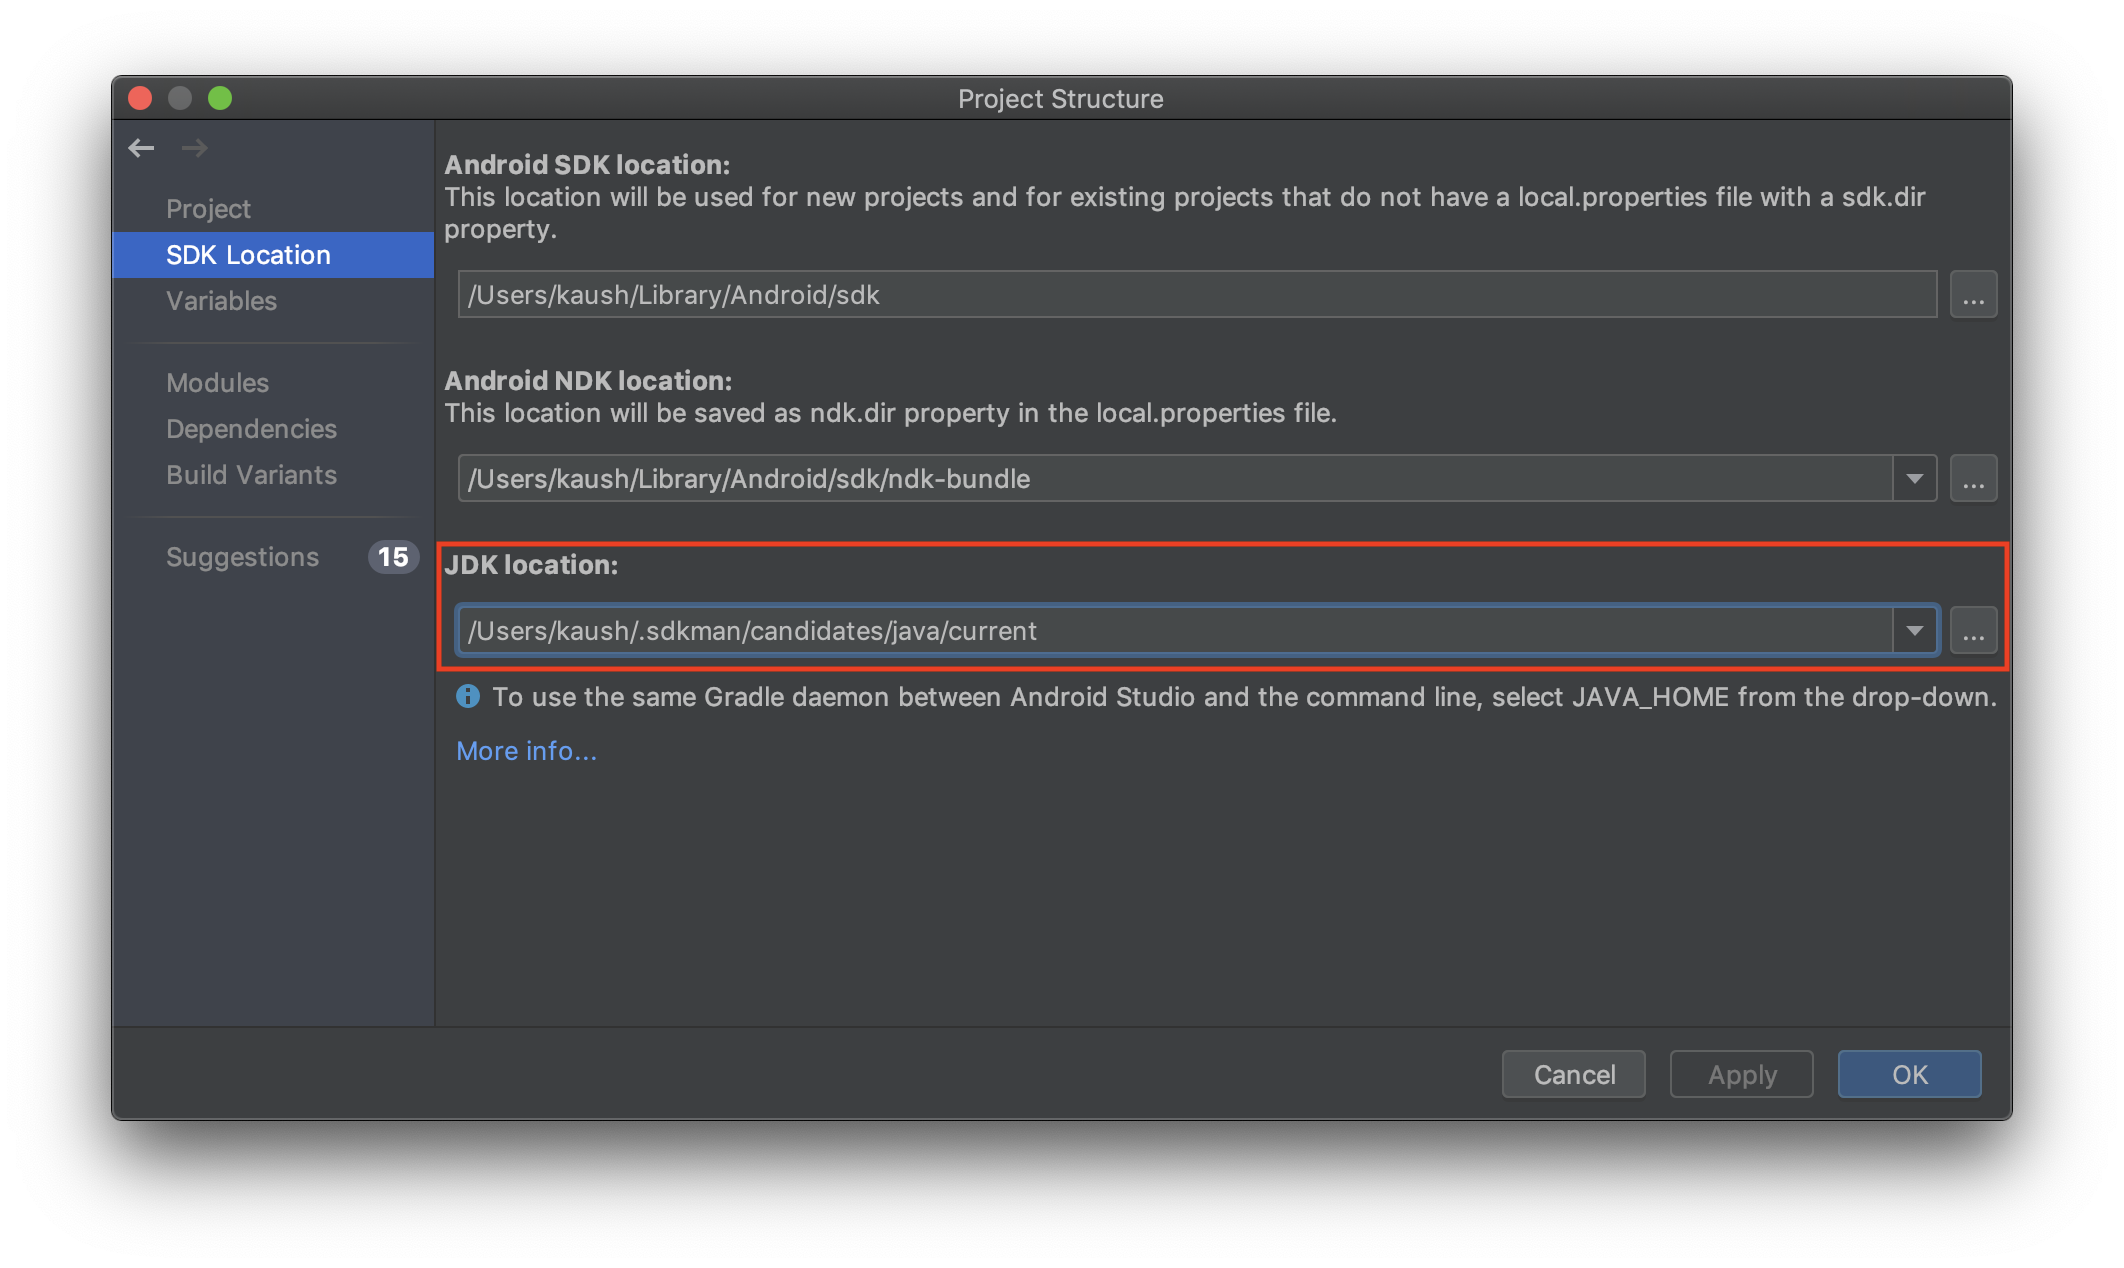
💥 now we’re in business.
Disable any useless plugins or add-ons that you don’t need #
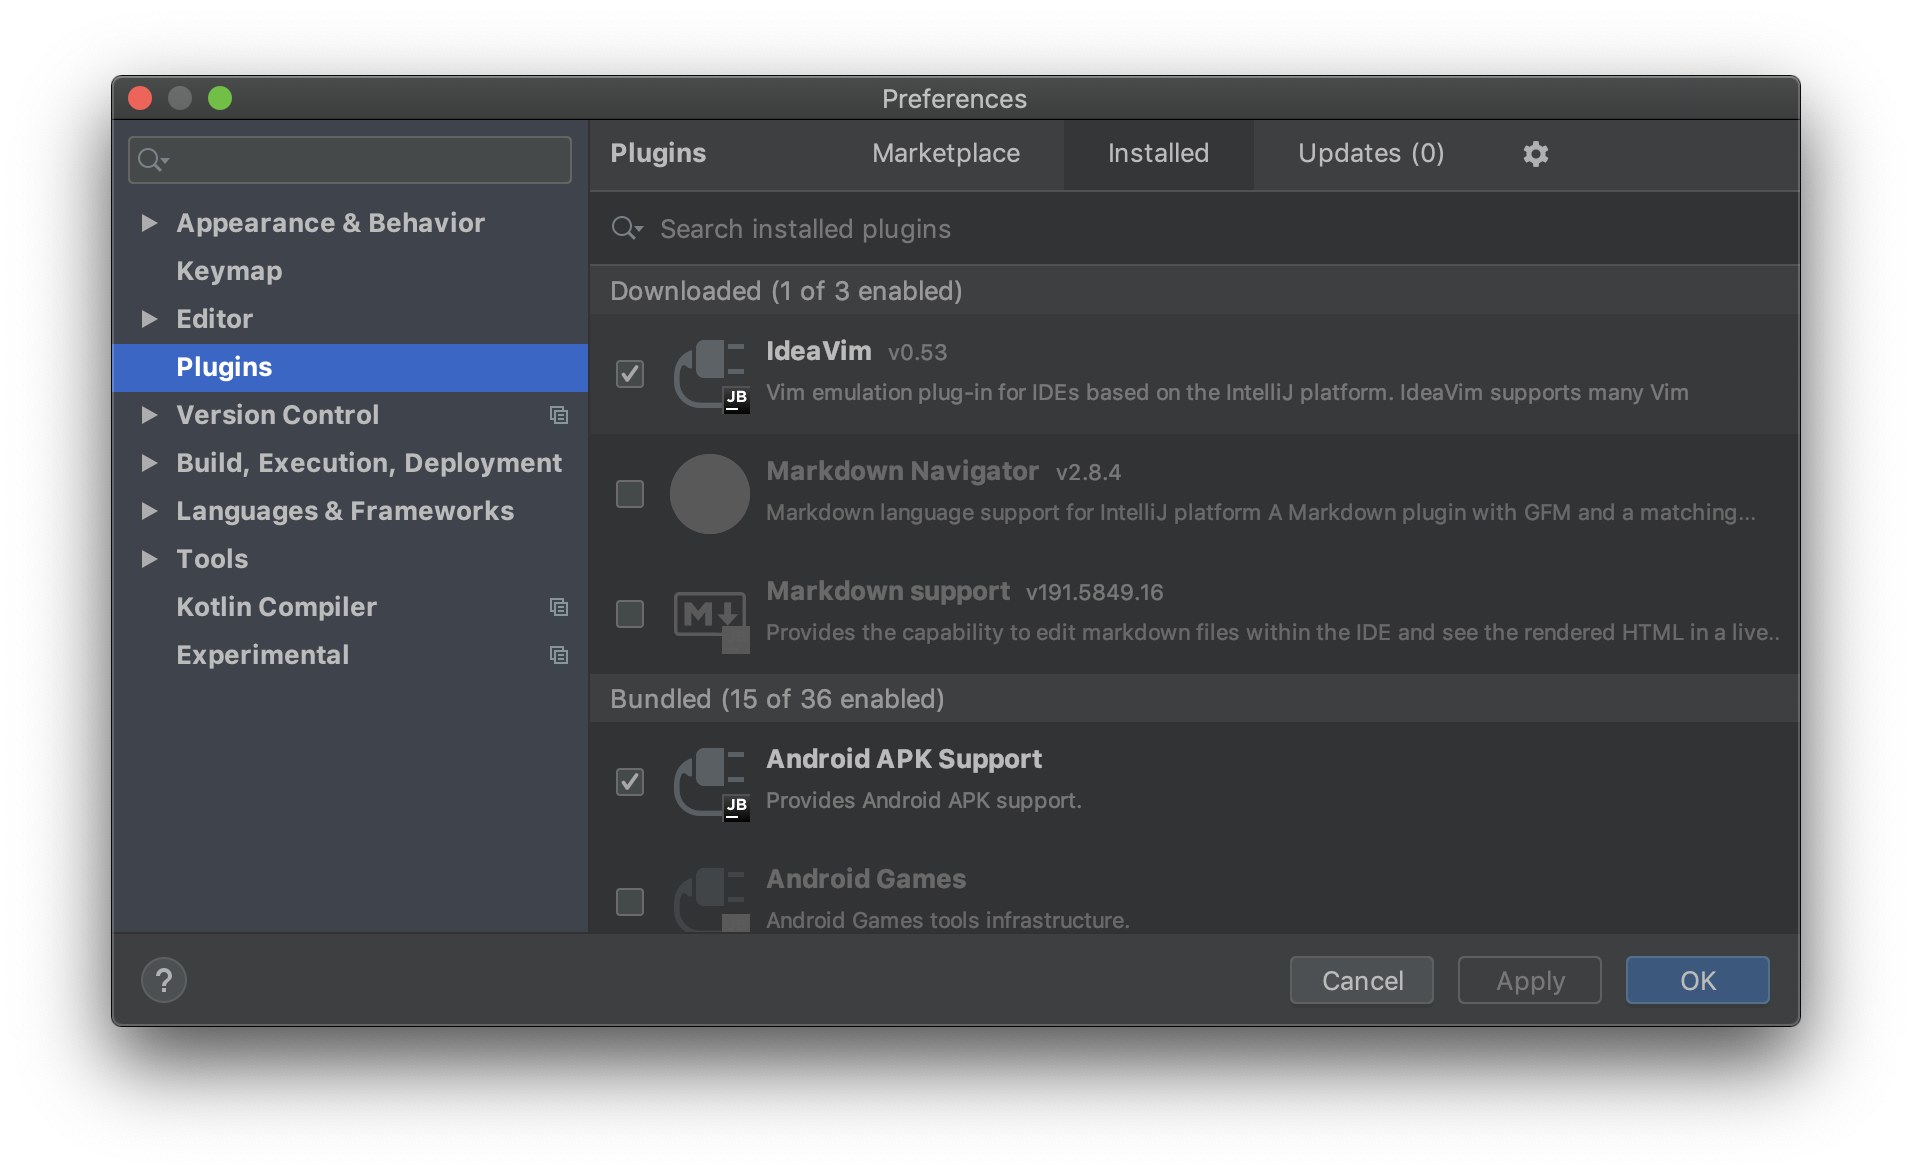
Don’t get carried away and disable everything here. It will hose your Android Studio. I know this cause I sure as hell tried.
The only plugins I have enabled are:
- (Downloaded) IdeaVim
- Android APK Suport
- Android NDK Support
- Git Integration (cause i like Intellij’s Differ)
- Gradle
- Groovy
- Il8n for Java
- Intellij Configuration Script
- IntelliLang
- Java Bytecode Decompiler
- JUnit
- Kotlin
- Properties Support
- Smali Support
- YAML
Everything else is disabled. This crony from Bob’s Discount Action Bars apparently knows a thing or two about Android.
Tweak your studio.vmoptions file
#
The official developer docs talk about configuring this properly.
tl;dr: in Android Studio head to “Help > Edit Custom VM Options…” and change it to the below:
#-Xms256m
#-Xmx2048m
-XX:ReservedCodeCacheSize=240m
-XX:+UseCompressedOops
-Dfile.encoding=UTF-8
-XX:+UseConcMarkSweepGC
-XX:SoftRefLRUPolicyMSPerMB=50
-Dsun.io.useCanonCaches=false
-Djava.net.preferIPv4Stack=true
-Djdk.http.auth.tunneling.disabledSchemes=""
-Djna.nosys=true
-Djna.boot.library.path=

-da
-Xverify:none

-XX:ErrorFile=$USER_HOME/java_error_in_studio_%p.log
-XX:HeapDumpPath=$USER_HOME/java_error_in_studio.hprof

# ###############################################
# custom settings from https://github.com/artem-zinnatullin/AndroidStudio-VM-Options/blob/master/studio.vmoptions
# ###############################################

# Runs JVM in Server mode with more optimizations and resources usage
# It may slow down the startup, but if you usually keep IDE running for few hours/days
# JVM may profile and optimize IDE better. Feel free to remove this flag.
-server

# Sets the initial size of the heap, default value is 256m
-Xms1G

# Max size of the memory allocation pool, default value is 1280m
-Xmx2G

# Sets the size of the allocated class metadata space that will trigger a GC the first time it is exceeded, default max value is 350m
-XX:MetaspaceSize=512m
Anything else you’ve come across that’s helped a lot? Hit me up on Twitter.
Updates since my post was originally published: ##
- @TheSNAKY pointed me to an easier way to get to the Edit VM options.
- @matthewcmckenna reminded me that using sdk man, using the
/currentpath is better as you upgrade versions. I’ve changed the commands here to mark the default installation and then just point to that within the Android Studio screenshots