If you’re looking to just copy-paste instructions, jump to the section below.
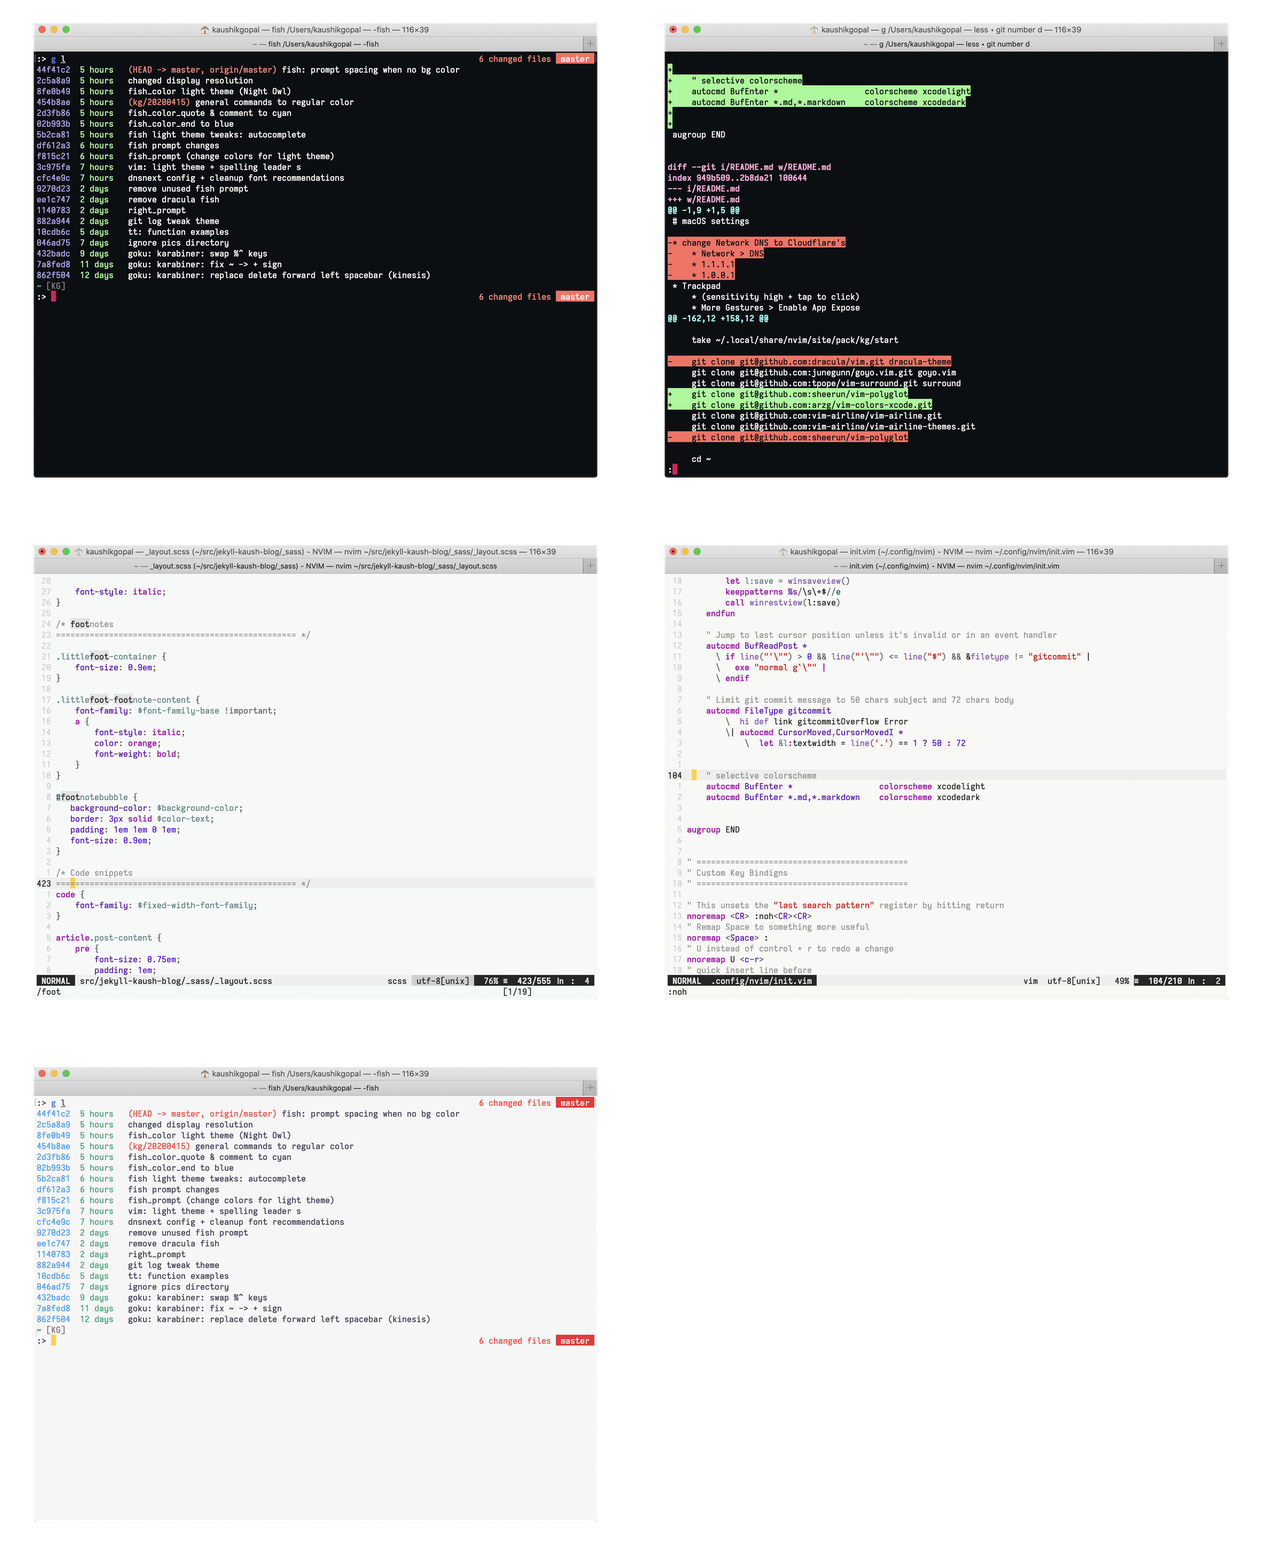
For the longest time, I’ve been rocking IBM Plex Mono as my programming font.
While it has served me well, I started to experiment with some newer monospaced typefaces to see if I could find one that was even more legible.1 That experiment quickly devolved into a rabbit-hole evaluation of a bunch of new programming fonts.
Hello Iosevka #
Eventually, I landed up with the font Iosevka:
- It’s far more legible (courtesy the extra long glyphs)
- It’s set pretty narrow which makes it pretty space efficient 2
- It’s 100% open-source
- You can build the font from source and customize it pretty extensively
- There’s ligatures (…or not …or dig this- for specific languages!)
Now at the outset, I actually didn’t like Iosevka at all. It was unbearably narrow for my taste but thankfully it also comes with an “Extended” variant. The extended variant adds a little more breathing room between characters making it less condensed.
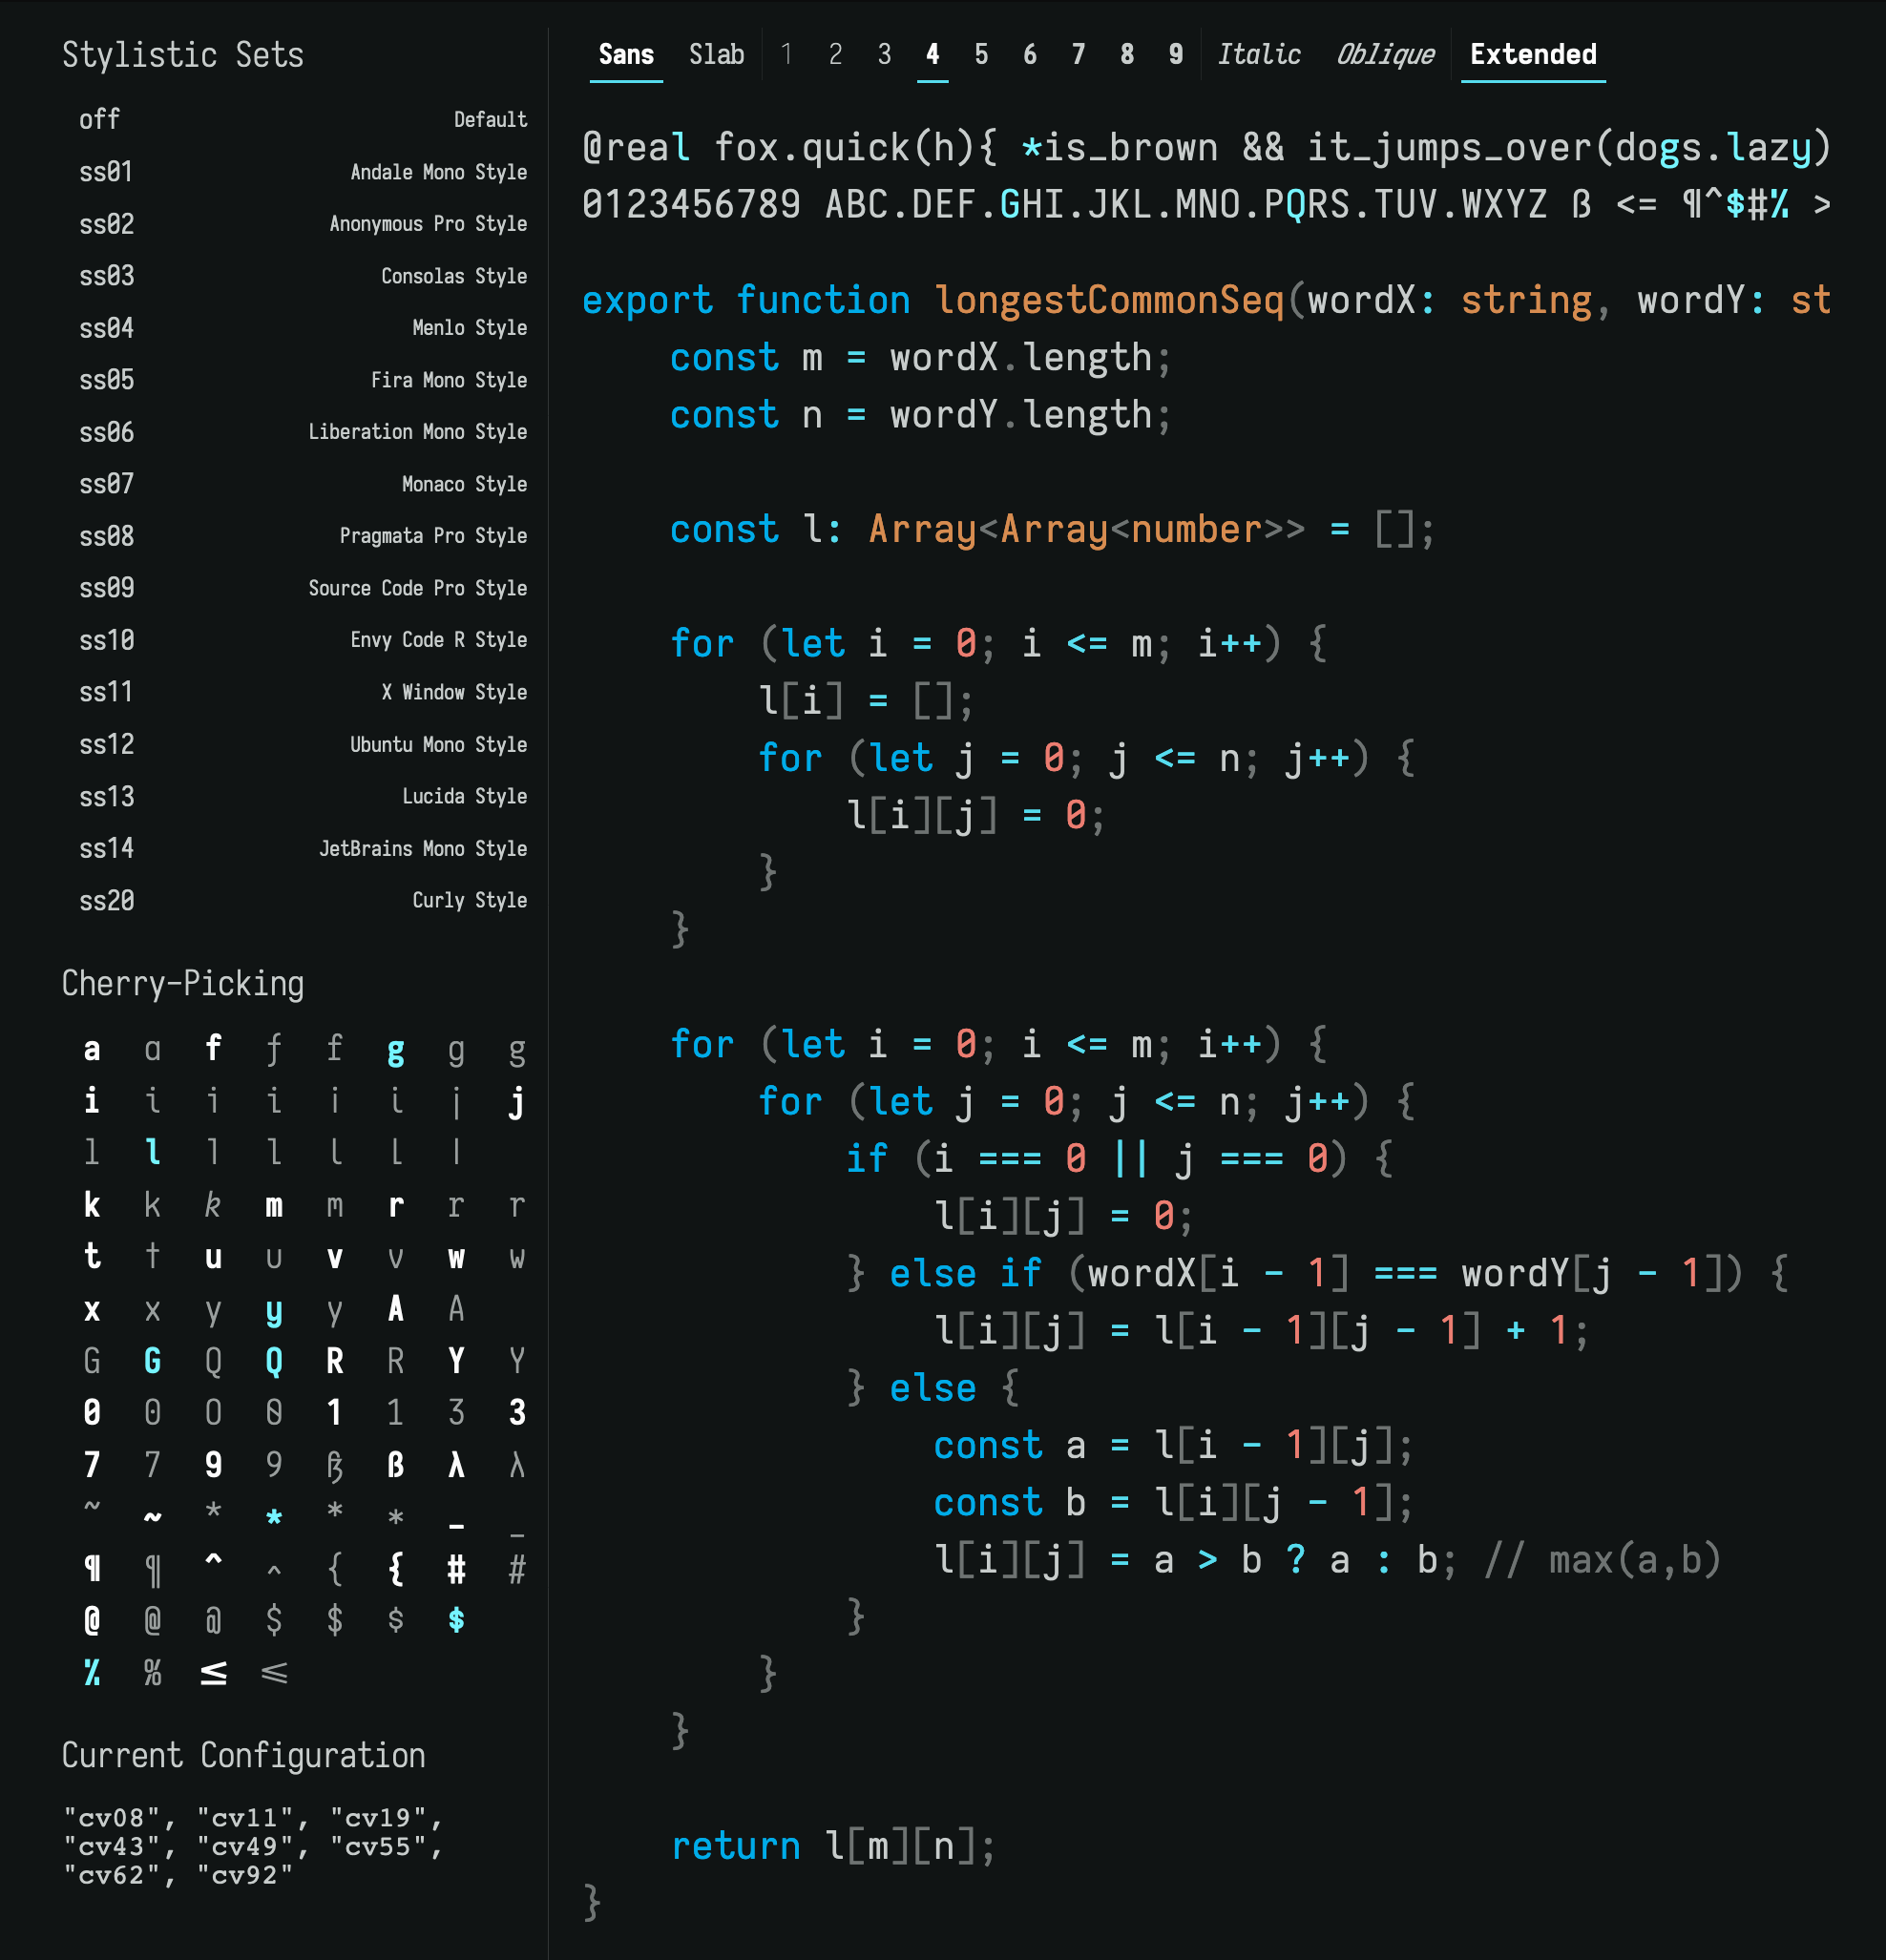
After I fiddled with it more and chose specific glyphs that are easier on my eyes, I think I landed up with a version that I absolutely love:

It’s more legible and dare I say a little more appealing than the trusty IBM Plex Mono .3 It almost hearkens back to my Inconsolata days (inspired by Gary Bernhardt’s DAS screen casts).
Customizing Iosevka #
Iosevka allows you to pick specific glyphs for certain characters.

If you notice the cherry-picking section in the above image, I’ve chosen slightly
different variants of g, l, y, G, Q, *, $ and %. If you head on
over to the main website, you can even live preview and
test a bunch of combinations.
Build Iosevka from source (on macOS) #
Once you’ve indulged your stylistic tendencies and honed in on the style you prefer, you can build the font right from the source. I didn’t find too many instructions online on how to do this with a Mac, so if you’re looking to do the same, this should save you some trouble:
Install necessary dependencies #
You need to have homebrew, pip and npm already installed.
git clone [email protected]:be5invis/Iosevka.git
# it's big, so it'll take sometime
cd Iosevka

brew install ttfautohint
brew tap caryll/tap
brew install otfcc-mac64
pip3 install afdko # has otf2otc
npm install
Build the font #
Make a copy of the sample build plan first and then edit it with your customizations. If you take a look at my sample build plan, it should become obvious how to do that.
cp private-build-plans.sample.toml private-build-plans.toml
vi private-build-plans.toml
# make your customizations

npm run build -- ttf::iosevka-kg
# fonts should be in dist/

# if you want to generate woff, eot etc.
# npm run build -- contents::iosevka-kg
That’s it! Open the dist directory and you should find your very own version
of Iosevka.
You can download the variant I’m currently using here.
While aesthetics played heavily into my choice before, nowadays my eyes are fierce about keeping legibility as the number one priority (a LASIK will do that to you). ↩︎
Truth be told, I’m actually not a fan of ultra-narrow fonts (looking at you Pragmata) and Iosevka is pretty darn narrow for my taste. But more on this later. ↩︎
Either that or I’m just bored 😋. ↩︎